Documentation Index
Fetch the complete documentation index at: https://flux101.com/llms.txt
Use this file to discover all available pages before exploring further.

1. Download Flux PuLID Model
You can download the Flux PuLID model here, and place it in the/models/pulid directory. Note that the model author updates the model regularly, so you only need to download the latest version. Of course, you can also download the old version and try it. Currently, I tested that the 0.9.1 version did not perform much better than the 0.9.0 version.
2. Download ComfyUI-PuLID-Flux-Enhanced Expansion
After downloading the model, you need to install the ComfyUI-PuLID-Flux-Enhanced expansion. You can install this expansion through ComfyUI’s ComfyUI-Manager. For detailed installation methods, please refer to the Install ComfyUI Extension article.3. Flux PuLID Workflow
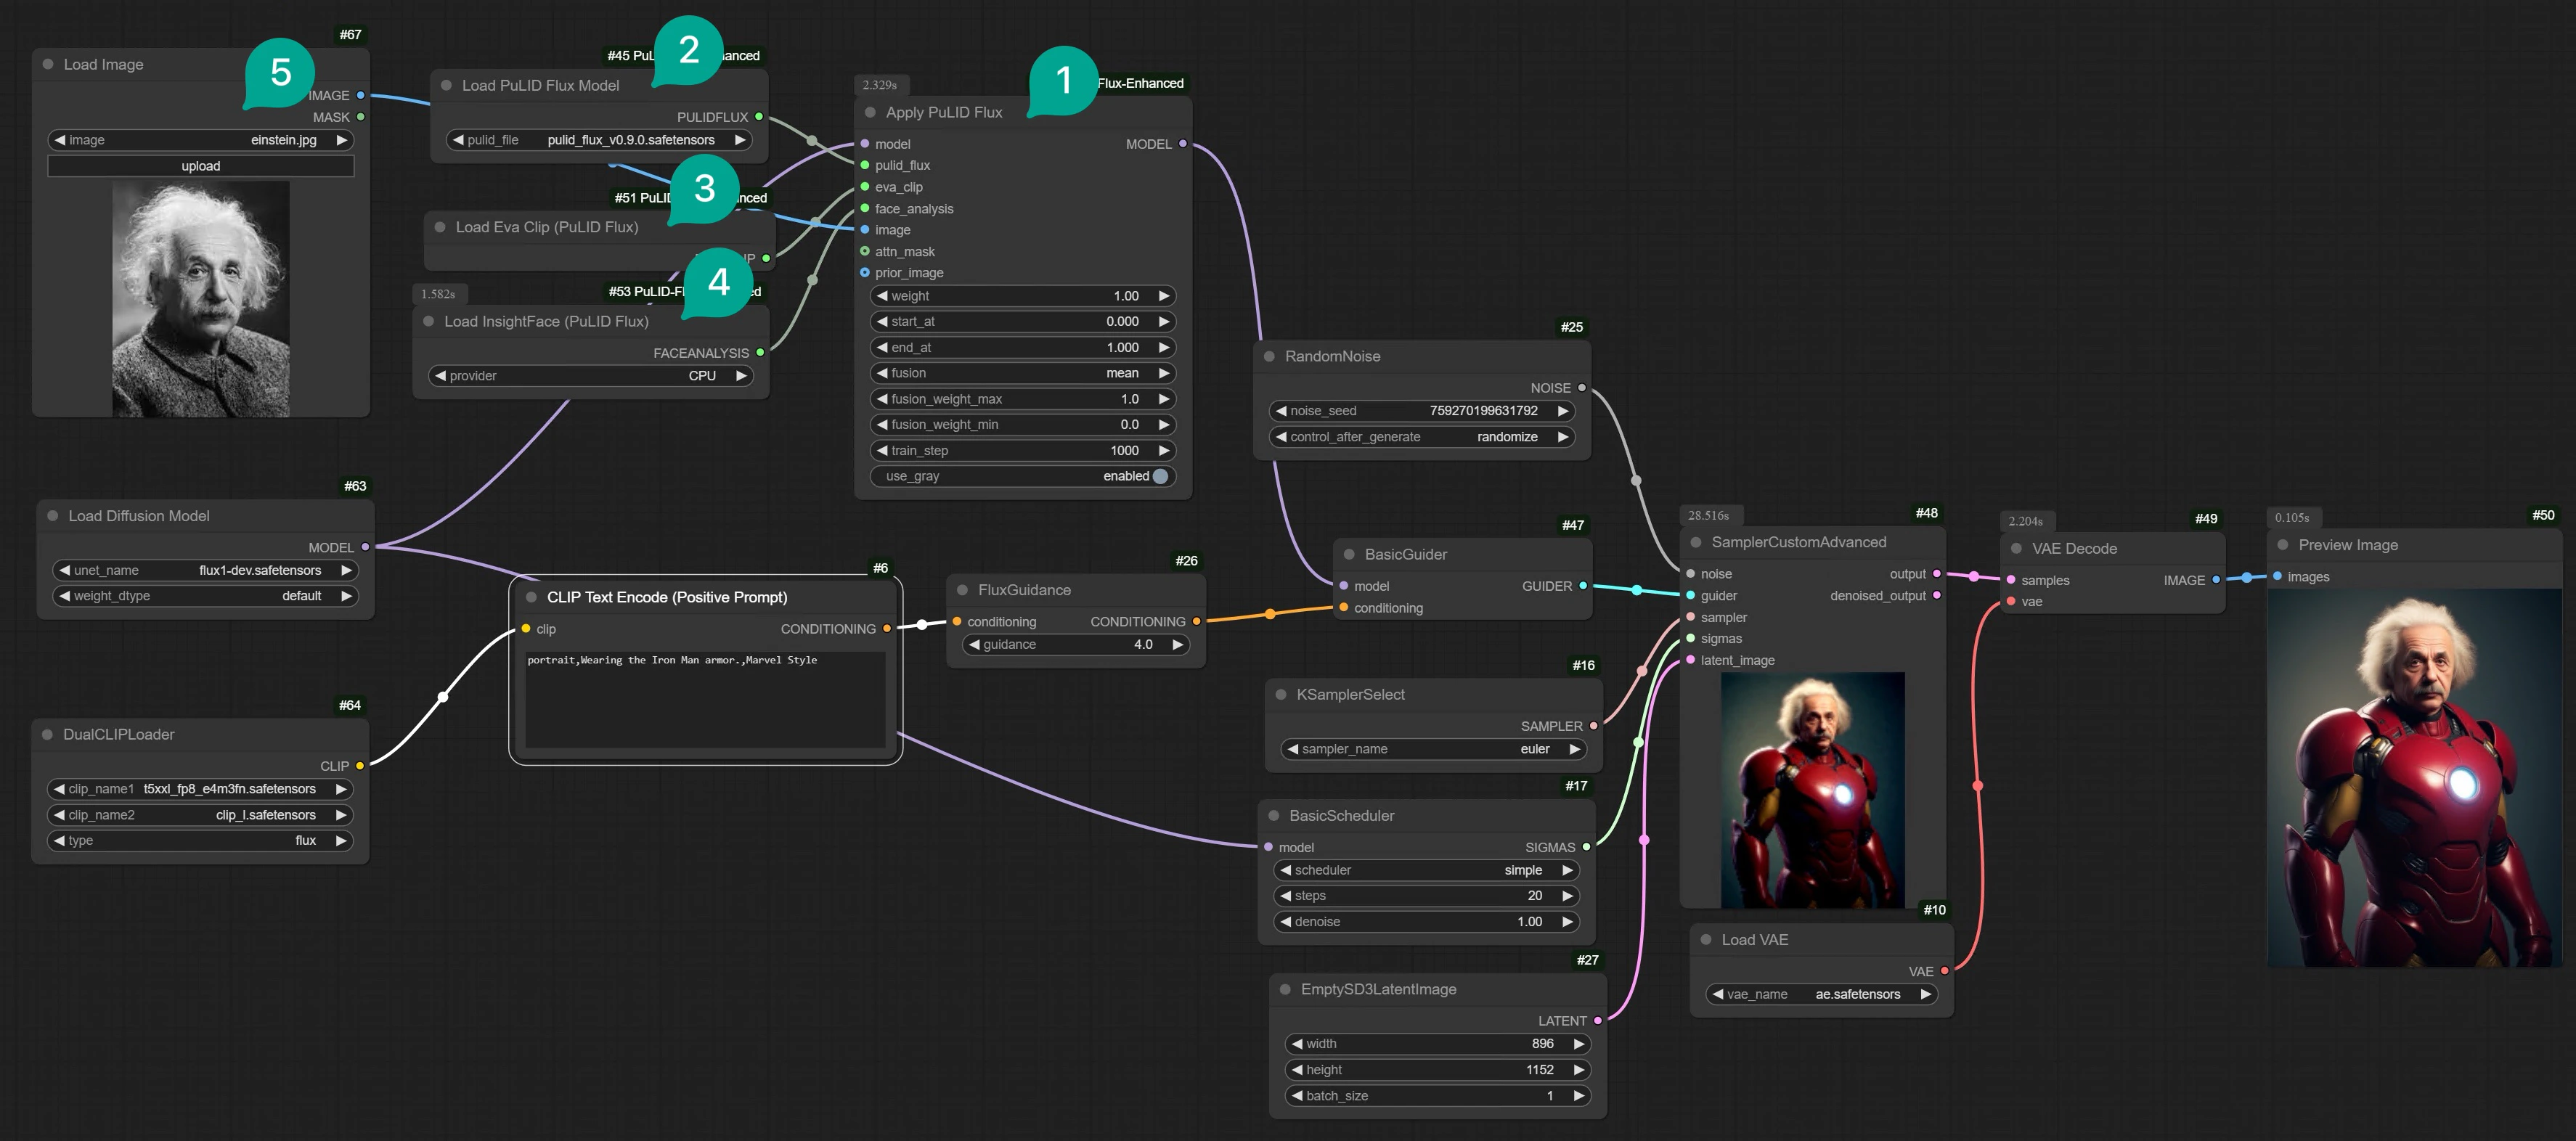
After installing the expansion, you can build a Flux PuLID workflow as shown in the image below. If you don’t want to manually connect, you can download this workflow template from Comflowy and import it into your local ComfyUI. (If you don’t know how to download Comflowy templates, you can refer to this tutorial.)Flux ComfyUI Workflow Template
Click the Remix button in the upper right corner to enter the ComfyUI workflow mode.
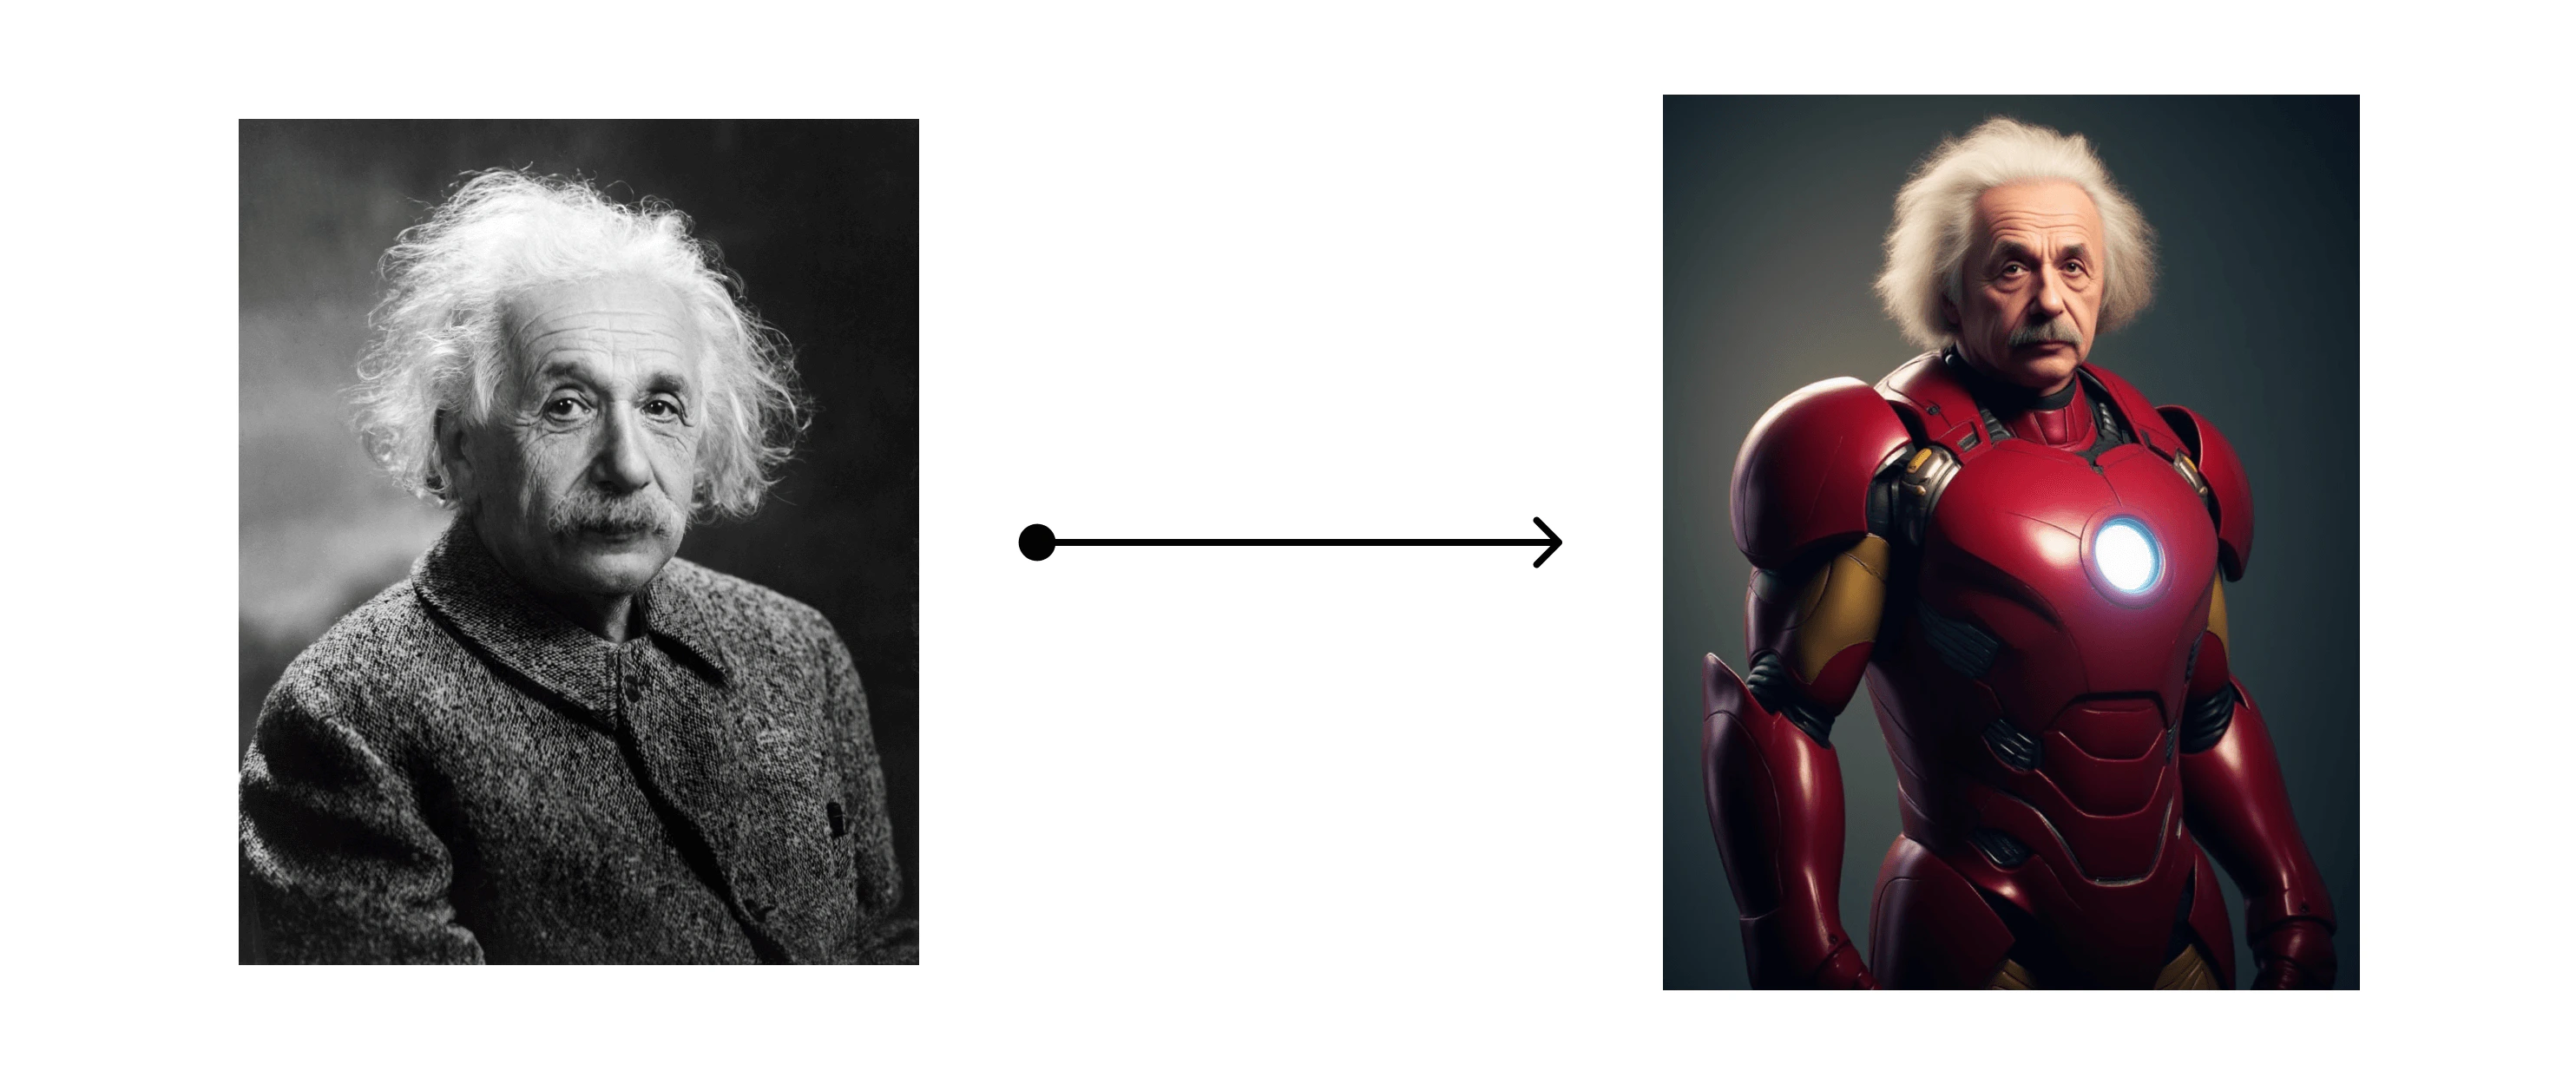
Apply PuLID Flux node (Figure ①) to the basic Flux workflow. Then connect it to the Apply PuLID Flux node. You can see that the implementation of PuLID Flux is similar to Redux. It converts an image to a set of word vectors through Clip, then translates these word vectors into data that Flux can understand using the PuLID model, and finally passes the Prompt and these image data to the Flux model.
-
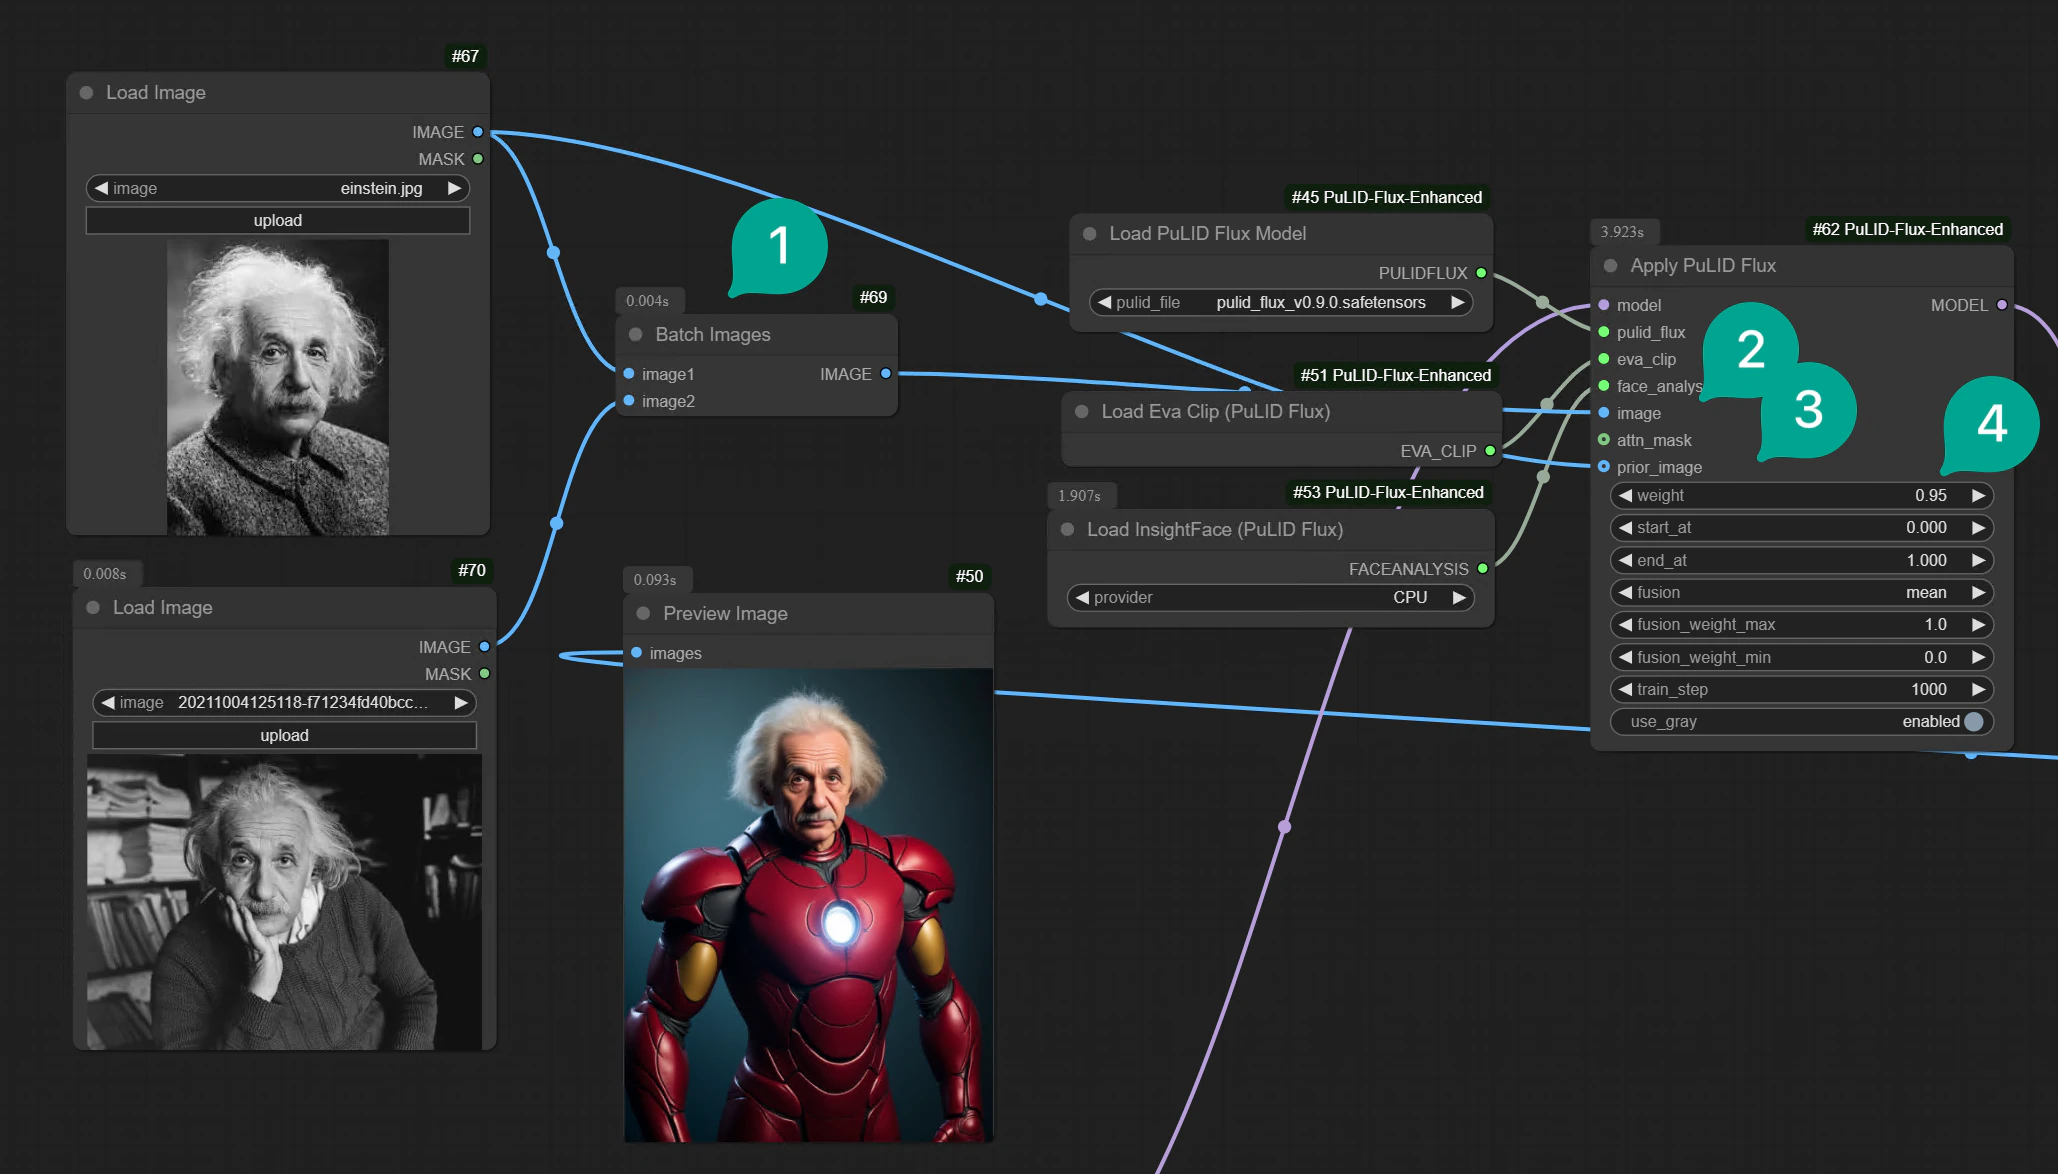
If the single image generation effect is not good, you can try importing multiple images. There are many ways to achieve this, the simplest being to use the
Batch Imagesnode (Figure ①), then import two images. Connect the Batch Images node to theimageendpoint (Figure ②) of theApply PuLID Fluxnode, and also make sure to connect the photo you most want the model to reference to theprior_imageendpoint (Figure ③) of theApply PuLID Fluxnode. -
Additionally, if you are using the v0.9.0 version of the PuLID model, the
weightparameter (Figure ④) in theApply PuLID Fluxnode needs to be set between 0.8-0.95. If it’s the v0.9.1 version, theweightparameter needs to be set between 0.9-1.0.
-
You can try setting the
fusionin theApply PuLID Fluxnode tomaxormax_token, which can enhance some main facial features (such as big eyes, special nose, etc.). However, it may cause distortion beyond fidelity. -
In some cases, using
use_graycan lead to detail loss, so you can try turning it off or on based on your experiments. For other parameters, in most cases, you don’t need to make adjustments. - It’s best to use the full version of Flux models, or fp16 and fp8 versions. I do not recommend gguf or nf4 versions.
- If you want to use fine-tuned models, it’s better to directly add LoRA rather than using a fine-tuned full model. This is because it might result in less satisfactory generation effects, but this is not absolute and requires your testing.